Wonder Button
Hi,
Here is a small piece of code which goes under a button placed on the Toolbar Menu within Notes Workspace.
[You can add a personalised button on the toolbar by accessing 'File Menu->Preferences->Toolbar Preference->Customize->New Button']
Once you are through with adding the button on to the Toolbar, Copy&Paste the below code and Save the button. Now, you are all set to use this new 'Wonder Button'.
'Wonder Button' helps you in tweaking field values of a document on the view without opening the document.Here's how it works:
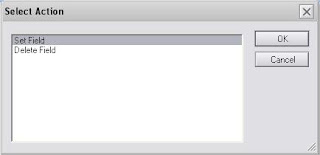
STEP 1: Select a document from the view and Click on the the 'Wonder Button' icon. You will get an Option to Set or Delete fields of the selected document.
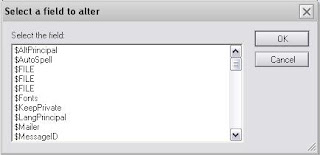
STEP 2: Choose the option as 'Set', you will be asked to choose the field you want to tweak from the list of available fields.
STEP 3: Choose the correct type of the field before proceeding.
STEP 4: Enter the new value for the field.
VOILA....your document has got the new value on the modified field and saved.
Go on and use this Wonder Button and let me know your thoughts on this.
Cheers
-Susheel
CODE :
actionSelect := @Prompt([OkCancelList]:[NoSort];"Select Action";"";"Set Field";"Set Field":"Delete Field");
List := @DocFields;
DataTypes := "Text" : "Date" : "Integer" : "Password" : "Name" : "Common Name" : "Remove Field" : "Text Multi Value" : "Date Multi Value" : "Integer Multi Value" : "Name Multi Value" : "Common Name Multi Value";
EditField := @Prompt( [OkCancelList] ; "Select a field to alter" ; "Select the field:" ; "CustomerReply" ; List ) ;
@If( actionSelect = "Delete Field"; @Return( @SetField( EditField; @DeleteField ) ) ; "" );
DataType := @Prompt( [OkCancelList] : [NoSort] ; "data type or action for field: " + EditField ; "Please Select the correct data type or action for field: " + EditField ; "Text" ; DataTypes );
RawValue := @If(
@Contains( DataType ; "Name Multi Value" ); @PickList( [Name] );
@Contains( DataType ; "Name" ) ; @PickList( [Name] : [Single] );
DataType = "Remove Field" ; "" ;
@Contains( DataType ; "Multi Value" ); @Prompt( [OkCancelEdit] ; "New Value for field: " + EditField ; "Please enter the new desired value for: " + EditField + " seperated with : for each value." ; @Abstract([TextOnly] ; 254 ; "" ; @Text( EditField ) ) );
@Prompt( [OkCancelEdit] ; "New Value for field: " + EditField ; "Please enter the new desired value for: " + EditField + "." ; @Abstract([TextOnly] ; 254 ; "" ; @Text( EditField) ) ) );
@If(
DataType = "Date" ; @If( @SetField( EditField ; @TextToTime( RawValue ) ) );
DataType = "Integer" ; @If( @IsError( @TextToNumber( RawValue ) ) ; "" ; @SetField( EditField ; @TextToNumber( RawValue ) ) ) ;
DataType = "Common Name" ; @SetField( EditField ; @Name( [CN]; RawValue ) ) ;
DataType = "Password" ; @SetField( EditField ; @Password( RawValue ) ) ;
DataType = "Remove Field" ; @SetField( EditField ; @DeleteField ) ;
DataType = "Text Multi Value" ; @SetField( EditField ; @Explode( RawValue ; ":" ) ) ;
DataType = "Date Multi Value" ; @SetField( EditField ; @TextToTime( @Explode( RawValue ; ":" ) ) ) ;
DataType = "Integer Multi Value" ; @If( @IsError( @TextToNumber( @Explode( RawValue ; ":" ) ) ) ; "" ; @SetField( EditField ; @TextToNumber( @Explode( RawValue ; ":" ) ) ) ) ;
DataType = "Name Multi Value" ; @SetField( EditField ; @Explode( RawValue ; ":" ) ) ;
DataType = "Common Name Multi Value" ; @SetField( EditField ; @Name( [CN]; @Explode( RawValue ; ":" ) ) );
@SetField( EditField ; RawValue )
);
""
DISCLAIMER : All the due credits goes to the original author of this piece of code.
Im just sharing this here to help fellow Notes Developers.


